The Colorado Coop
Our family, myself (Dan), my wife TJ, my son Silas and daughter Lydia, all moved to rural Colorado about one year ago from Minnesota. I have always dreamed of living in the mountains, especially near the San Juan Range, one of the most beautiful places in the lower 48 states. We wanted to find a good elevation to be at a lower elevation so winters are temperate (which isn't hard for a Minnesotan) but close to the San Jaun mountain range. Montrose, CO emerged as the perfect living place, with a town of nearly 20,000 people and elevation 5,800 feet. The climate in Montrose is incredible .... summer weather is fantastic, spring is long, winter is mild (compared to MN), and fall is amazing!!
Then it happened, we got notified that our rental would be put on the market and we would need to find other lodgings. Hence a last minute search for a property commenced and in this hot real estate market, to find a property that met our animal needs, proved to be rather difficult.

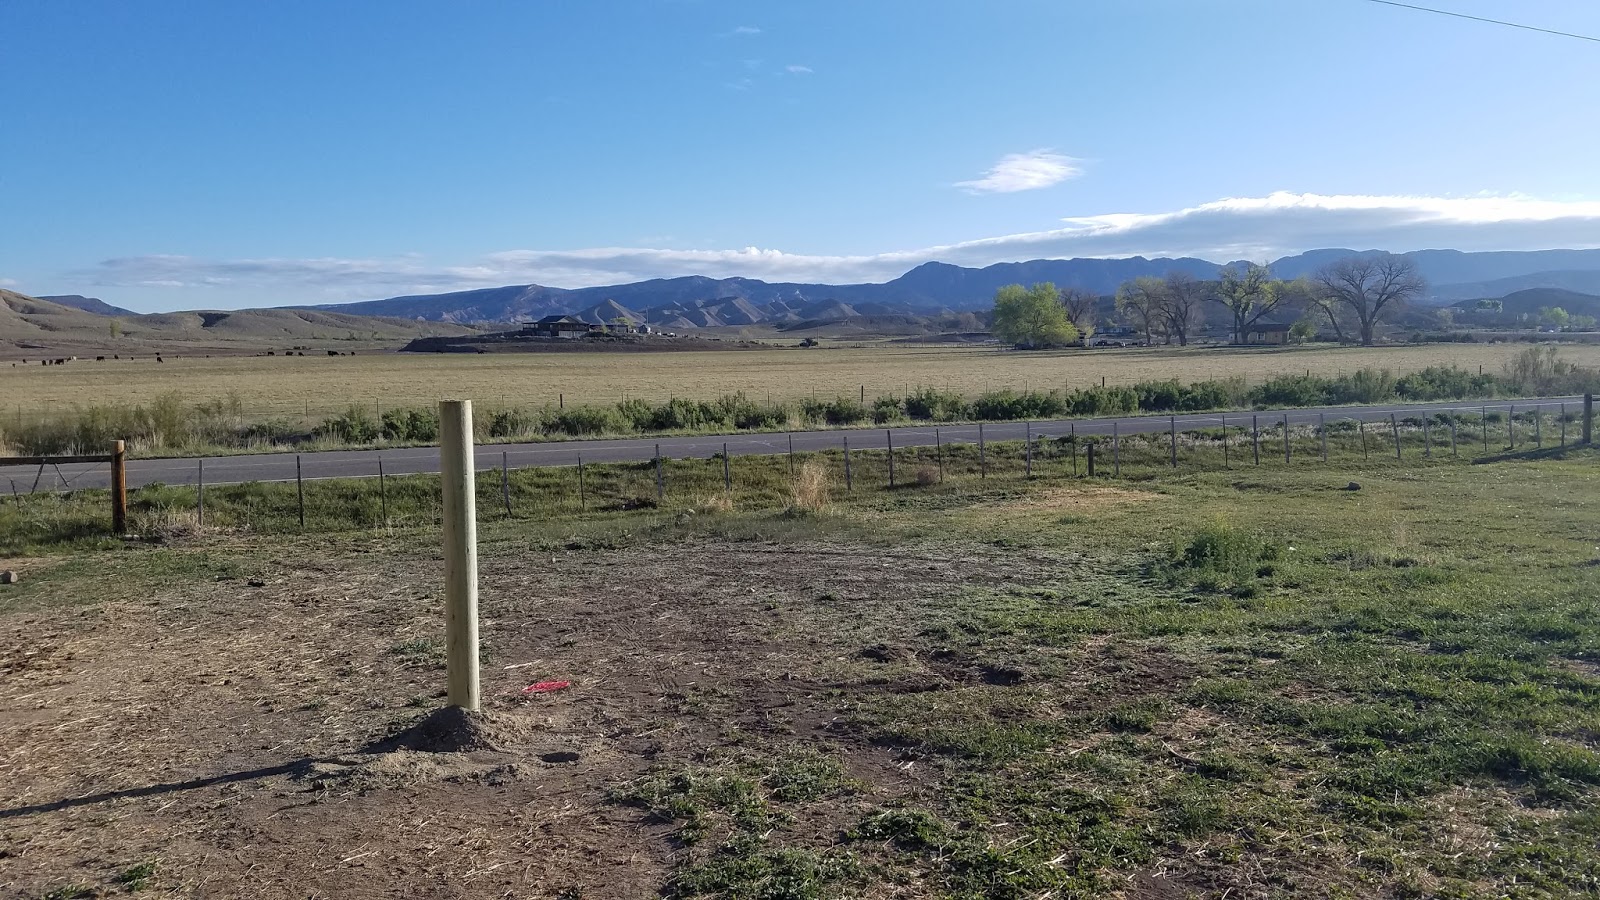
Finally we located a 13 acre property, within 1 mile of town. It has nearly a 360 degree view of the San Juans, Grand Mesa, Flat Top, the Black Canyon and the Uncompahgre National Forest. If you like panoramic views, amazing sunsets, stars and quiet rural life with close proximity to town ... this really is a dream property for us. However there was a missing key element, Alas no Chicken Coop ...


Side note: Given the move we had to find temporary accommodations for the chickens. We housed them in our horse trailer for a few weeks while we finished the coop project. The horse trailer actually worked rather well as a temporary lodging situation!
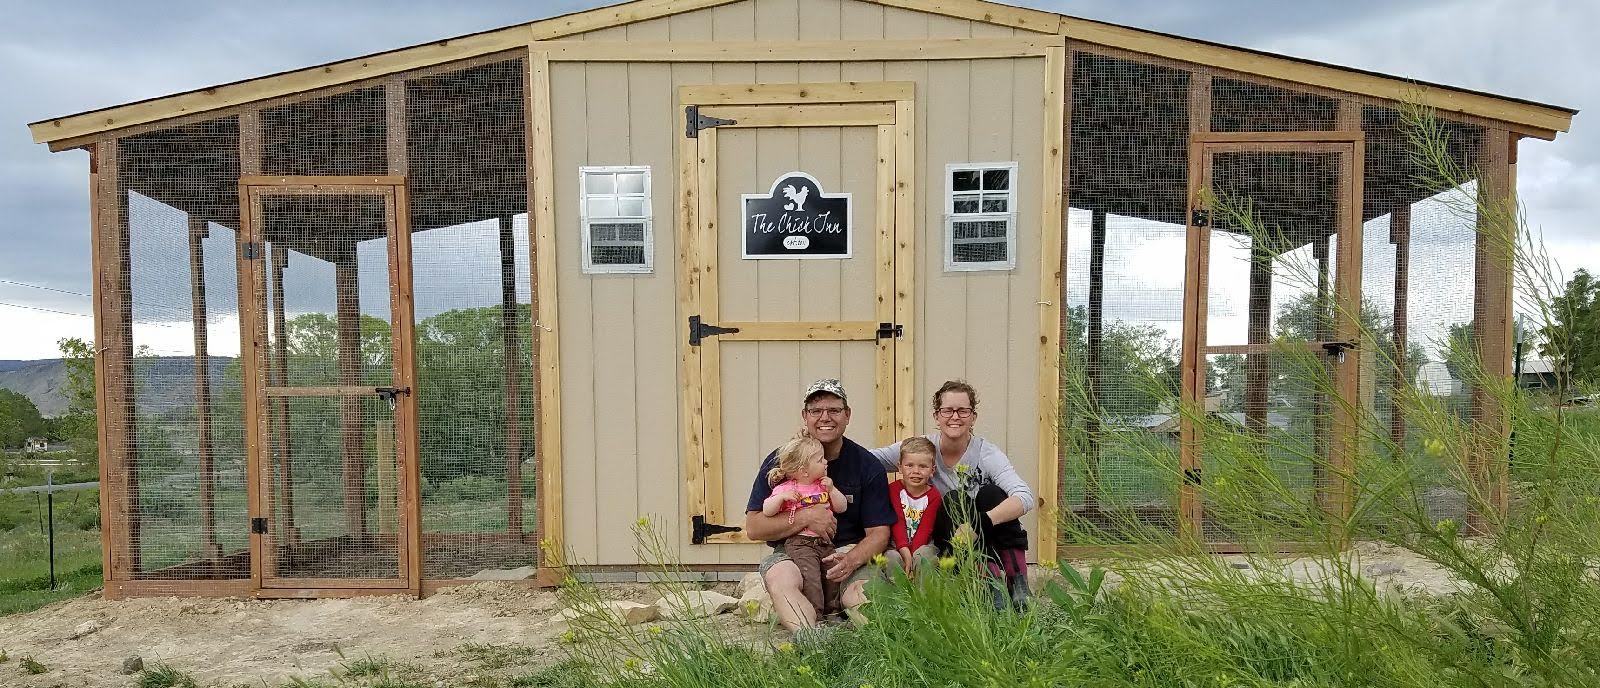
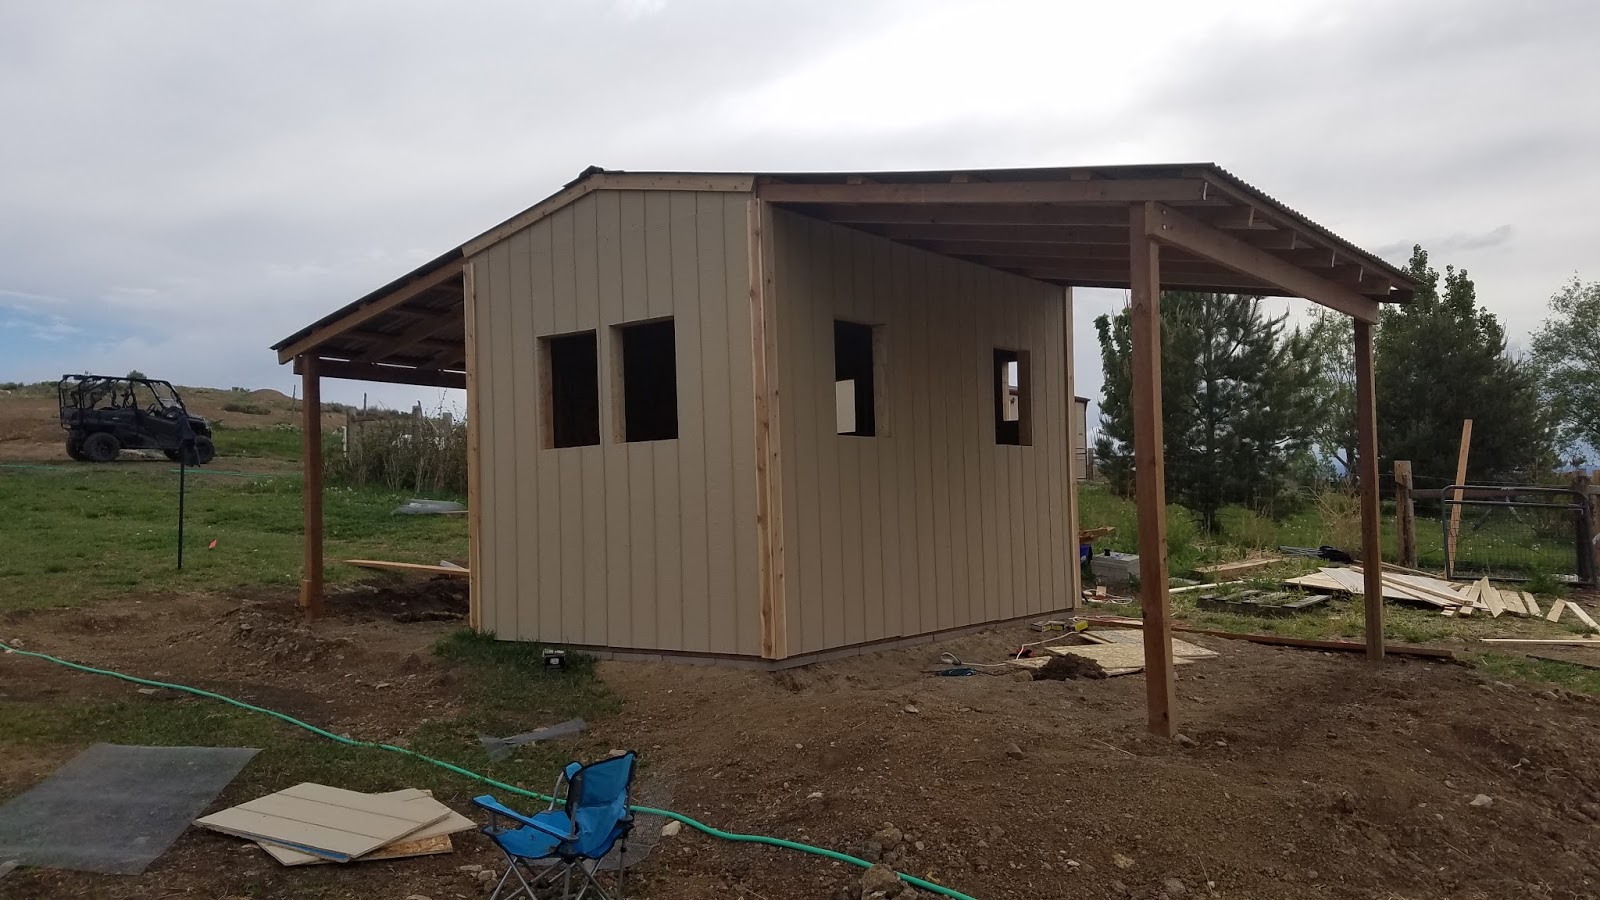
The exterior design premise of the chicken coop is that we were looking for shade overhangs in summer and sun availability in winter. Basically, we wanted southern sun exposure for winter time to keep the chickens dry and warm while keeping the snow out. We wanted northern exposure for summer time to maximize on shade. We built roughly a 22' x 12' entire structure, with 8'x12' enclosed coop interior and two wire enclosed sides that measure 7'x12' on north and south.


Once the floor frame and sub-floor were in place, we began construction on framing of the coop
with the interior dimensions of 8'x12', with 8' walls.

The
roof then commenced in earnest, we have variable weather in rural
Colorado and you never know what weather might appear. For the roof
we hand constructed our own gable
trusses to cover the 12' expanse on each side including the shaded
overhangs. 4' was for the enclosed coop and 7' for the overhang. I think this
was the trickiest part in the coop design, was extending the coop with a
12x3 pitch, but using some good levels and bracing we were able to
accomplish the continuation of roof line out over our eventual wire areas.


A day later, after the snow melted and all siding was fully attached my wife had ordered windows from Shed Windows and More. We had used Shed Windows and More products on a previous coop and
really liked the windows. I framed in the windows and then cut holes
using a sawzall and the windows worked perfectly. The windows come
with a basic screen but we added an additional 1/4" hardware cloth over
all the
screen areas for each window, to help alleviate any predators getting through the windows. All the
doors are custom framed, cut and trimmed. I framed in the door,
cutting again with the sawzall, then we framed in another 2"x4", to
give a good frame of the
door something solid to close and secure against. Lastly we added
hinges and latches for
closing.


Now
that the windows and doors were in place, the coop was nearing
completion with just a few items to wrap up. I used 1/2" hardware cloth
for the
exterior shaded areas and stapled it every 3" and sometimes more! We also added a 24" hardware apron to
prevent animals from digging under the sides into the coop,
so the hardware cloth comes down to the ground and then goes below about 2"
round and then extended another 24" horizontally, under dirt away from the coop. The theory is a critter, like a fox, coyote or stray dog will come up on the coop and will dig by the wall and find the hardware cloth and "cease &
desist" from digging under (we will see how it works).


The
final projects were to get the interior painted, roost up and roll away
nest
boxes up. I built the nest box with 6 nests for our 12 hens. The
primary reason we
designed a roll away nest box was to allow us to be gone for a day
without
having to collect eggs and hopefully alleviate any egg eating from
starting. My wife TJ did all the interior painting, she used a kiltz
primer & Behr exterior paint. She painted the nest boxes various
colors of exterior paint For A Splash Of Color.


The final, final project was attaching our sign, that we got from Dakota Sign Co, family friends from Rochester, MN. They have made several signs for our ranch, and do fantastic work!


Our chickens now have a functional and secure home, to enjoy their beautiful views in Montrose CO


A special Thank-you to our friend Jean. She put in a lot of hours building the coop and helping us move. She was a huge blessing, always coming with a positive attitude, encouraging us and keeping us motivated

The
only remaining feature we plan to add this summer is an exterior
Chicken Run 50'x100' with 5' tall wire fencing with another under ground
hardware apron.


We built a 22x12 structure with 8x12 interior chicken coop
with two 7x12, hardware cloth enclosed overhangs, one facing north to
maximize on shade in summer and one facing south to maximize on sun in
winter. We added a ridge vent & 6 windows for lighting and ventilation. We built in
numerous security protections including 1/2" hardware cloth on floor
framing, 1/4" hardware cloth ridge vent, 24" hardware 1/2" aprons to
prevent animals digging under overhangs and buried 2" under dirt and
lastly 1/4" hardware cloth on screened windows. We added roll-away nest
boxes so we can be gone for day or two and not worry about "egg eating birds".


We liver over the hill in Carbondale, how did the coop do with snow load and sliding off? We are updating our coop in the spring. Thanks for the inspiration.
ReplyDeleteGreat craftsmanship and thoughtful planning throughout this chicken coop build. I especially liked the attention to ventilation, predator protection, and durable framing details. Your project shows how careful design creates lasting results. Custom framing solutions are equally important for building secure, functional, and long-lasting structures of any size.
ReplyDelete